E-Mag

Monday, November 24, 2008
~Winter Wonderland~
Winter_Wonderland.jpg)
~Winter Wonderland~
This tutorial was written by me on 11-24-2008, and
is intended for those who has a basic knowledge
of PSP. Any resemblance to another tutorial is strictly
coincidental and unintentional.
To complete this tutorial you will need the following:
1 Mask I am using Vix_ChristmasMask5 which can be found HERE
3 photos of your choice
I am using scenery pictures of Winter in Yosemite
taken by a personal friend and her husband.
To find a large variety of scenic photos check HERE
All effects come standard with PSP
Now that we have our supplies gathered we are ready to get started!
1. Open a new canvas 700 x 600 fill white
2. Create new raster layer
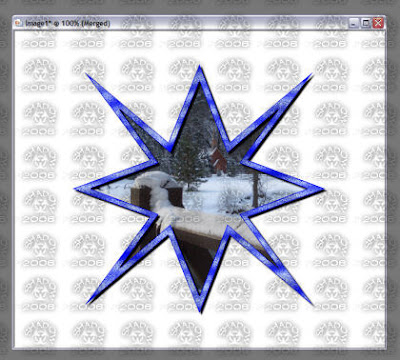
3. Go to preset Shapes You can use any shape you like
I used star 7 line width 7 foreground and stroke any color you choose
I used 080bf2 and fill color null create as vector size and position
as desired, then go to layers, merge, merge down
4. Using you magic wand tool click inside your frame.
5. Go to selections, modify, expand by 4
Selections invert
6. Open one of the images you picked now copy and paste as new layer.
Move beneath your frame layer and press delete
( you may have to resize and position your image for desired portion to be seen )
Selections, select none.
7. Using your magic wand on your frame layer select your frame.
Go to selections, modify, contract by 2
8. Using the airbrush tool with the following settings:
size: 30, hardness: 10, step: 27, density: 45, thickness: 100, opacity: 50, blend mode: Overlay
using a lighter color than your frame put random lines over the frame
to look like dust or snow I used c1e5e5
9. Go to Selections, Select none.Now go to layers
Merge, Merge down and add a drop shadow of choice to your frame.
10. Make your
white background invisible, then merge, merge visible.
you can reopen your white layer now.
you should now have something like this:
To find a large variety of scenic photos check HERE
All effects come standard with PSP
Now that we have our supplies gathered we are ready to get started!
1. Open a new canvas 700 x 600 fill white
2. Create new raster layer
3. Go to preset Shapes You can use any shape you like
I used star 7 line width 7 foreground and stroke any color you choose
I used 080bf2 and fill color null create as vector size and position
as desired, then go to layers, merge, merge down
4. Using you magic wand tool click inside your frame.
5. Go to selections, modify, expand by 4
Selections invert
6. Open one of the images you picked now copy and paste as new layer.
Move beneath your frame layer and press delete
( you may have to resize and position your image for desired portion to be seen )
Selections, select none.
7. Using your magic wand on your frame layer select your frame.
Go to selections, modify, contract by 2
8. Using the airbrush tool with the following settings:
size: 30, hardness: 10, step: 27, density: 45, thickness: 100, opacity: 50, blend mode: Overlay
using a lighter color than your frame put random lines over the frame
to look like dust or snow I used c1e5e5
9. Go to Selections, Select none.Now go to layers
Merge, Merge down and add a drop shadow of choice to your frame.
10. Make your
white background invisible, then merge, merge visible.
you can reopen your white layer now.
you should now have something like this:
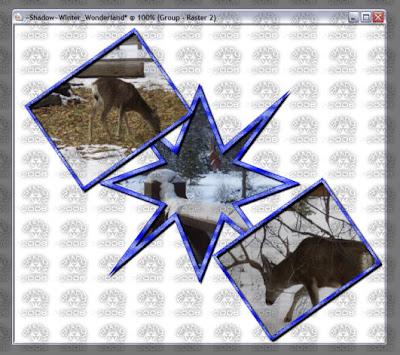
10. Again to your preset shapes tool. This time using a rectangle
or square with a foreground and stroke of 5 fill null. Same colors as used for first frame
again create as vector. rotate and position toward the top left corner of the original
frame try to avoid covering the first image if possible.
then convert to raster layer.
11. Repeat steps 4 through 9 for your new frame.
then close out your background and original frame layers go to layers,
merge, merge visible.
Now reopen your other layers again.
12. Repeat steps 10 and 11 for a third and final frame, but
move this one to the lower right corner of your original frame.
Now you should be here:
13. Select your background layer, then create new raster layer.
14. Using your fill tool flood fill this layer with a color that compliments
your images and the mask you have chosen to use.
I filled with 8dbbf2
15. Go to layers, Load/save mask, Load mask from disk
go to layers, merge, merge group
( if you chose to use the Vix_ChristmasMask5 as I did you may need to
reposition in order to see the wording. )
16. Now go to layers, merge, merge all.
17. Resize by 70%
18. Add your name, artist information, and your personal watermark if you use one.
You're done!!!
Thank you for attempting this tutorial.
I hope you enjoyed it.
Saturday, November 8, 2008
~Thanksgiving Window~

~Thanksgiving Window~
This tutorial was written by me on 11-9-2008.
It is intended for those with a basic general knowledge
of PSP and looking for a tutorial that can be
as simplistic or as complicated as those completing it
choose to do. Any resemblance to another
tutorial is purely coincidental and unintentional.
In order to complete this tutorial, you
will need to first complete the tutorials for both boy and girl
Thanksgiving Bears as well as The Turkey by Vicki. These can be found HERE
Upon completion of these tutorials you will have the two tubes
needed to complete this one, or you can use a tube or tubes
of your choice, but please remember to follow artist TOU's.
You will also need a scenic photo of choice, something that
shows a field or forest scenery is preferred.
A mask of choice. I have found that in my opinion
this tutorial works best with a mask that looks like a window of sorts.
I am using WSL169 from Wee Scots Lass which can be found HERE
Now that we have all of our supplies we are ready to begin.
Since this is such a simplistic tutorial there will be no screen shots.
1. Complete the tutorials from Vicki or open the tube or tubes
you have chosen to use.
2. Open new canvas 800 x 600 and fill white.
3. Go to selections, select all.
4. Create new raster layer.
5. Go to selections, modify, contract by 30.
6. Open your scenery / landscape, copy and paste into selection.
7. Selections, select none.
8. Create mask layer using your mask of choice
be sure to check fit to layer. I used WSL 169
9. Layers, Merge, Merge group.
10. Place your bears and Turkey, or the tube/tubes that you choose
as desired.
11. Layers, Merge, Merge all
12. Resize by 70%
13. Add new raster layer, add your name and any artist information
14. Layers, Merge, Merge all.
You're done!!!
I hope you enjoyed this tutorial and if you attempted Vicki's tutorials
in order to complete I hope you had fun
with those as well.
This tutorial was written by me on 11-9-2008.
It is intended for those with a basic general knowledge
of PSP and looking for a tutorial that can be
as simplistic or as complicated as those completing it
choose to do. Any resemblance to another
tutorial is purely coincidental and unintentional.
In order to complete this tutorial, you
will need to first complete the tutorials for both boy and girl
Thanksgiving Bears as well as The Turkey by Vicki. These can be found HERE
Upon completion of these tutorials you will have the two tubes
needed to complete this one, or you can use a tube or tubes
of your choice, but please remember to follow artist TOU's.
You will also need a scenic photo of choice, something that
shows a field or forest scenery is preferred.
A mask of choice. I have found that in my opinion
this tutorial works best with a mask that looks like a window of sorts.
I am using WSL169 from Wee Scots Lass which can be found HERE
Now that we have all of our supplies we are ready to begin.
Since this is such a simplistic tutorial there will be no screen shots.
1. Complete the tutorials from Vicki or open the tube or tubes
you have chosen to use.
2. Open new canvas 800 x 600 and fill white.
3. Go to selections, select all.
4. Create new raster layer.
5. Go to selections, modify, contract by 30.
6. Open your scenery / landscape, copy and paste into selection.
7. Selections, select none.
8. Create mask layer using your mask of choice
be sure to check fit to layer. I used WSL 169
9. Layers, Merge, Merge group.
10. Place your bears and Turkey, or the tube/tubes that you choose
as desired.
11. Layers, Merge, Merge all
12. Resize by 70%
13. Add new raster layer, add your name and any artist information
14. Layers, Merge, Merge all.
You're done!!!
I hope you enjoyed this tutorial and if you attempted Vicki's tutorials
in order to complete I hope you had fun
with those as well.
Friday, October 31, 2008
~Autumn Fantasies~
DB_Autumn_Fantasies.jpg)
This tutorial was written by me on 10-31-08, and
is intended for those with at least a
general knowledge of PSP. Any resemblance
to another tutorial is completely accidental
and unintentional.
To complete this tutorial you will need the following:
A tube of choice I am using the wonderful work of
Deacon Black which can be purchased HERE
A scrap kit of choice I am using Autumn Harvest from
Scraps by Storm which can be purchased HERE or HERE
Once we have gathered all of the items we have chosen
to work with it is time to begin.
1. Open new canvas 600 x 600 fill white.
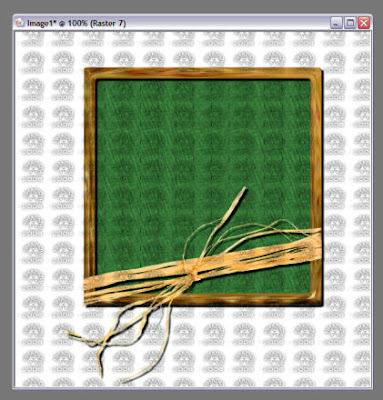
2. Copy and paste a frame from your chosen kit.
3. Using your magic wand click inside your frame, then go to
selections, modify, expand by 10
4. Create new raster layer. Open a paper from your kit or one of choice
then copy and paste into selection. Now move this layer beneath your frame.
Selections, select none.
5. Go to effects, texture effects, texture. And choose a texture you like
to give your paper a more worn look.
6. Let's go back to your frame layer.
Add a drop shadow of choice. Mine is V & H 4 Blur 3 Opacity 100
you should have something similar to this at this point
7. Open your tube, copy and paste as new layer. Resize and position as desired.
If a little of the top of your top rises over the frame no problem.
8. Duplicate your tube layer, move the original layer beneath your frame.
make sure you use your eraser tool to remove anything that goes
below the bottom edge of your frame.
9. Go to adjust, blur, Gaussian blur radius 10.
Now add the same drop shadow used on your frame.
10. Duplicate this tube layer, and move the top copy above your frame below
the unadjusted tube.
11. Select your unadjusted tube layer and go to layers, merge, merge down.
This will combine the unadjusted tube layer with the copy of your blurred tube.
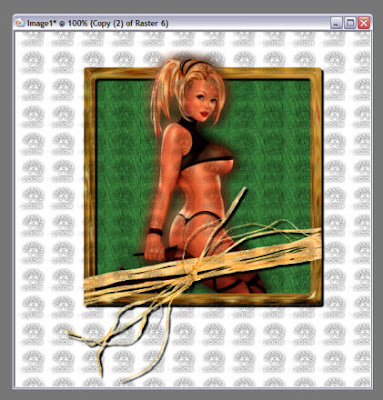
12. Using your eraser tool remove the lower portions of the tube to expose the
bottom of your frame. This should give the effect of your tube sitting in a window
with the lower portion inside and the upper portion outside.
At this point you should have something like this.
13. Now add any decorations or embellishments that you want.
14. Resize by 70%. Add artist copyright information, your watermarks or taggers mark,
15. Add name go to layers merge, merge all and you're finished!!
Thank you for taking the time to try this tutorial.
I hope you enjoyed it.
Monday, October 20, 2008
~Window to Paradise~
Window_To_Paradise1.jpg) ~Window To Paradise~
~Window To Paradise~This tutorial was written by me on 10-20-2008.
It is meant to be an easy tag for any experience
level including beginners. Any resemblance to another
tutorial is strictly coincidental and unintentional.
To complete this tut you will need the following:
Leafy Overlays pack from I Got Lucky Skraps which
can be purchased HERE or HERE
Autmumn Harvest Scrap kit, and Neon Halloween Scrap kit
from Scraps by Storm these can be purchased HERE or HERE
A stock photo of choice. I suggest using a nice beach scenery.
Everything comes with any version of PSP.
Now that we have gathered our supplies... Let's get started!!
1. Open new canvas 600 x 600 fill white
2. Go to Effects, Texture Effects, Texture
now choice whichever texture you prefer
3. Open sbs_autumnharvestmetalframe1
Copy and paste as new layer
4. Using your magic wand tool click inside of your frame.
5. Go to selections, Modify, Expand by 10
6. Add new raster layer
7. Open your iglskraps_leafyflower_overlay at this time
Copy and paste into selection
8. Now move your overlay layer beneath your frame.
You can play with effect if you like. I added an inner bevel
you should now have something that looks like this:
It is meant to be an easy tag for any experience
level including beginners. Any resemblance to another
tutorial is strictly coincidental and unintentional.
To complete this tut you will need the following:
Leafy Overlays pack from I Got Lucky Skraps which
can be purchased HERE or HERE
Autmumn Harvest Scrap kit, and Neon Halloween Scrap kit
from Scraps by Storm these can be purchased HERE or HERE
A stock photo of choice. I suggest using a nice beach scenery.
Everything comes with any version of PSP.
Now that we have gathered our supplies... Let's get started!!
1. Open new canvas 600 x 600 fill white
2. Go to Effects, Texture Effects, Texture
now choice whichever texture you prefer
3. Open sbs_autumnharvestmetalframe1
Copy and paste as new layer
4. Using your magic wand tool click inside of your frame.
5. Go to selections, Modify, Expand by 10
6. Add new raster layer
7. Open your iglskraps_leafyflower_overlay at this time
Copy and paste into selection
8. Now move your overlay layer beneath your frame.
You can play with effect if you like. I added an inner bevel
you should now have something that looks like this:
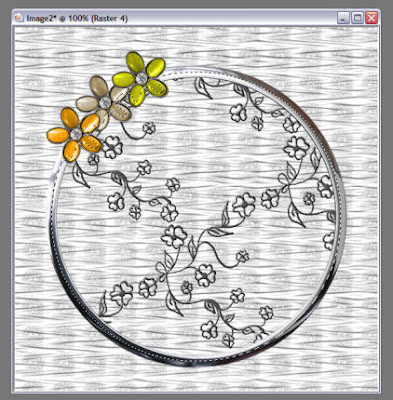
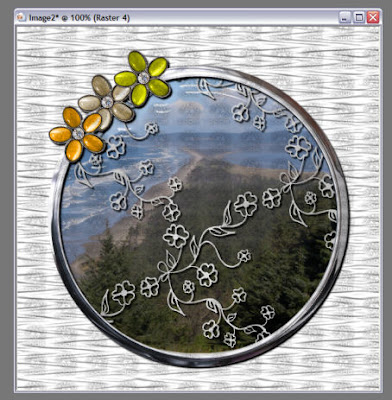
9. Now open your chosen scenery
Copy and paste as new layer
10. Move your scenic layer beneath your overlay layer
11. Go to selections, Invert, now press delete.
Look you now have a picture window!!
12. Now it's time to add some elements ( or decorations if you prefer)
The flowers I am using were custom made using colors or my choice
However if you would like to use a similar flower
you can find it in the Neon Halloween Kit by Scraps by Storm
Don't forget word art over your window if you so choose.
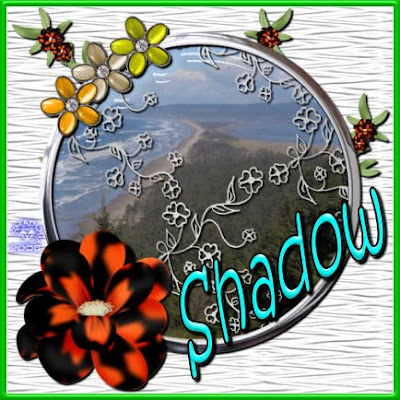
13. Once you have decorated to your liking go to layers, merge, merge all.
14. Go to Image, add borders, border with 10 symetrical, choose a color
that compliments your tag. I am using green.
15. Now using your magic wand click on your border. Tolerance 10 feather 0
16. Go to effects, 3 D effects, Inner Bevel. Use a bevel of your choice
to give your frame a glass or metal look / feel to it.
17. Resize and add watermark and name and your done!
I hope you enjoyed this tutorial and thank you again for giving it a try.
Below is a second version of mine without the word art.
Sunday, October 5, 2008
~Think Pink~
SB_ThinkPink.jpg)
~Think Pink~
This tutorial was written by me on 10-5-2008 using
PSP X, and intended for those with a basic
knowledge of PSP. Any resemblance to another tutorial
is merely coincidental and unintended.
To complete this tutorial you will need the following:
I'm a survivor Scrap Kit by Kimmie's Kreations
this is a PTU kit that can be purchased HERE
At least one tube of choice.
I've done two versions
One with the Artwork of Scott Blair
which can be purchased HERE
Another using the Artwork of Keith Garvy
which can be purchased HERE
Once we have our supplies together we are ready to go!
1. Open new Canvas 600 x 600 transparent
2. Create new raster layer
3. Go to selections, select all
4. Open one of the Survivor frames of your choice
Copy and paste into selection.
If you choose a grunge frame you may choose to move
your frame around a bit to center due to the drop shadow
on the piece from the kit.
5. Go to selections, Modify, Contract by 15
6. Create new raster layer and move beneath your frame layer
7. Open a Survivor paper of choice
Copy and paste into selection
8. Selections select none
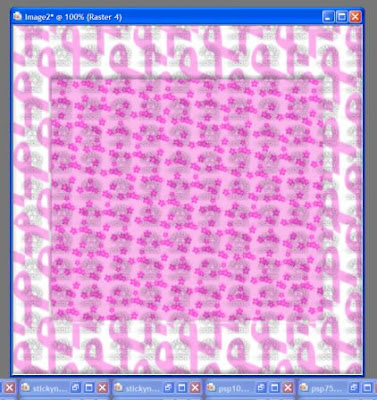
you should have something similar to this
9. Now copy and paste your tube as a new layer
Resize and position as desired
10. Add a drop shadow off choice
I used V & H 5, Opacity 100, blur 3 color black
11. Choose a Survivor element or piece of Survivor Wire Word Art
and decorate as you see fit
12. Add same drop shadow as before reducing opacity to 80
13. Go to Layers, merge, merge all
14. Resize by 70%
15. Now add artist information, watermarks, and name.
Congratulations you're finished!!
Thank you for taking the time to Think Pink with me.
I hope you enjoyed this tutorial.
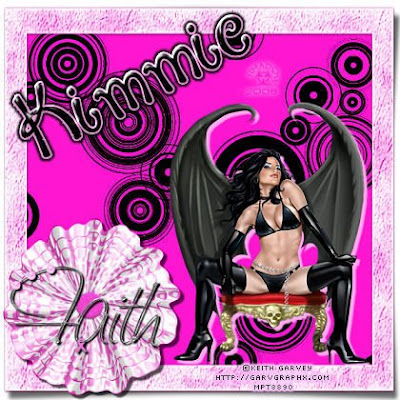Garv_ThinkPink.jpg)
PSP X, and intended for those with a basic
knowledge of PSP. Any resemblance to another tutorial
is merely coincidental and unintended.
To complete this tutorial you will need the following:
I'm a survivor Scrap Kit by Kimmie's Kreations
this is a PTU kit that can be purchased HERE
At least one tube of choice.
I've done two versions
One with the Artwork of Scott Blair
which can be purchased HERE
Another using the Artwork of Keith Garvy
which can be purchased HERE
Once we have our supplies together we are ready to go!
1. Open new Canvas 600 x 600 transparent
2. Create new raster layer
3. Go to selections, select all
4. Open one of the Survivor frames of your choice
Copy and paste into selection.
If you choose a grunge frame you may choose to move
your frame around a bit to center due to the drop shadow
on the piece from the kit.
5. Go to selections, Modify, Contract by 15
6. Create new raster layer and move beneath your frame layer
7. Open a Survivor paper of choice
Copy and paste into selection
8. Selections select none
you should have something similar to this
9. Now copy and paste your tube as a new layer
Resize and position as desired
10. Add a drop shadow off choice
I used V & H 5, Opacity 100, blur 3 color black
11. Choose a Survivor element or piece of Survivor Wire Word Art
and decorate as you see fit
12. Add same drop shadow as before reducing opacity to 80
13. Go to Layers, merge, merge all
14. Resize by 70%
15. Now add artist information, watermarks, and name.
Congratulations you're finished!!
Thank you for taking the time to Think Pink with me.
I hope you enjoyed this tutorial.
Saturday, October 4, 2008
~Spooktacular~
Spooktacular.jpg)
~Spooktacular~
This tutorial was written by me on 10-04-2008.
It is intended for those with a basic knowledge of PSP.
Any resemblance to another tutorial is strictly
coincidental and unintentional. Mine was done using
PSP X but should be able to be completed in any version.
To complete this tutorial you will need the following:
The Spooktacular Scrap kit by Kimmie's Kreations
this is a Pay To Use kit that can be purchased HERE
One mask of choice
At least one tube of choice
I am using the Excellent artwork of Brian Rood
which can be purchased HERE
Now that we have our supplies, we
are ready to begin.
1. Open a new canvas 600 x 600
2. Add new raster layer
3. Go to selections, Select All
4. Open one of the papers from the Spooktaculer kit
Copy and paste into selection.
5. Create new Raster Layer everything should still be selected
6. Open another of the Spooktacular papers that compliments
your first paper as well as your tube. Again Copy and paste into selection
7. Go to selections, Select None
8. Now it's time to ad your mask layer either by going layers
load mask from disk, or if your more comfortable create mask from image.
Either way you will need to fit to canvas, Invert data so that top paper forms a
frame around the bottom paper.
9. Once you have settled on a mask and are happy with the appearance
go to layers, merge, merge group.
You should have something similar to this:
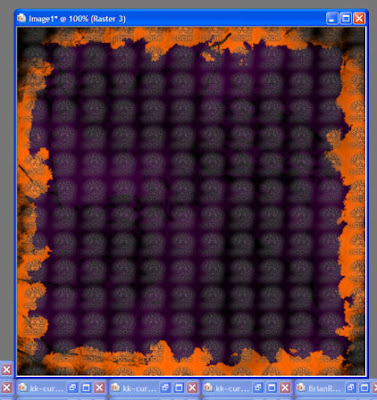
10. It is now time to pick a Spooktacular frame.
Copy and paste as new layer.
11. Using your magic wand click anywhere outside of the frame.
12. Go to selections, invert. Back to selections, modify, contract by 15.
13. Create new raster layer, and move
beneath your frame layer
14. Open a third Spooktacular paper
Again copy and paste into selection
15. Go to selections, Select None
16. Open the tube you have selected to use.
Copy and paste as new layer. Now resize and position beneath frame layer
so it appears like a photograph
17. Add a drop shadow. I used V & H 5 Opacity 100 blur 3 color black
18. Close out your paper and mask layers,
go to layers, merge, merge visible.
You should now have something similar to below
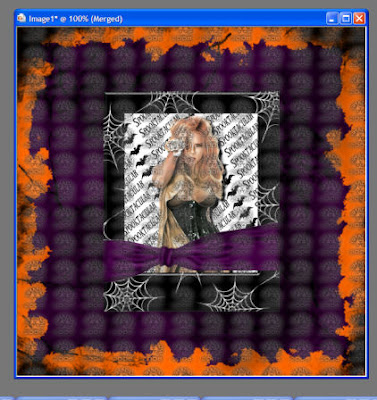
19. This is your jump off point. It's decoration time.
Pick as few or as many elements as you like and decorate your tag.
20. Go to layers, merge, merge all
21. Resize your image by 70%
22. Now pick a Spooktacular Tombstone
resize and position as desired.
23. Add your name to the tombstone
24. Now add artist information and your marks
and congratulations your done, all you have left to do
is Save it!!
Thank you for taking the time to try this tutorial.
I hope you enjoyed it.
It is intended for those with a basic knowledge of PSP.
Any resemblance to another tutorial is strictly
coincidental and unintentional. Mine was done using
PSP X but should be able to be completed in any version.
To complete this tutorial you will need the following:
The Spooktacular Scrap kit by Kimmie's Kreations
this is a Pay To Use kit that can be purchased HERE
One mask of choice
At least one tube of choice
I am using the Excellent artwork of Brian Rood
which can be purchased HERE
Now that we have our supplies, we
are ready to begin.
1. Open a new canvas 600 x 600
2. Add new raster layer
3. Go to selections, Select All
4. Open one of the papers from the Spooktaculer kit
Copy and paste into selection.
5. Create new Raster Layer everything should still be selected
6. Open another of the Spooktacular papers that compliments
your first paper as well as your tube. Again Copy and paste into selection
7. Go to selections, Select None
8. Now it's time to ad your mask layer either by going layers
load mask from disk, or if your more comfortable create mask from image.
Either way you will need to fit to canvas, Invert data so that top paper forms a
frame around the bottom paper.
9. Once you have settled on a mask and are happy with the appearance
go to layers, merge, merge group.
You should have something similar to this:
10. It is now time to pick a Spooktacular frame.
Copy and paste as new layer.
11. Using your magic wand click anywhere outside of the frame.
12. Go to selections, invert. Back to selections, modify, contract by 15.
13. Create new raster layer, and move
beneath your frame layer
14. Open a third Spooktacular paper
Again copy and paste into selection
15. Go to selections, Select None
16. Open the tube you have selected to use.
Copy and paste as new layer. Now resize and position beneath frame layer
so it appears like a photograph
17. Add a drop shadow. I used V & H 5 Opacity 100 blur 3 color black
18. Close out your paper and mask layers,
go to layers, merge, merge visible.
You should now have something similar to below
19. This is your jump off point. It's decoration time.
Pick as few or as many elements as you like and decorate your tag.
20. Go to layers, merge, merge all
21. Resize your image by 70%
22. Now pick a Spooktacular Tombstone
resize and position as desired.
23. Add your name to the tombstone
24. Now add artist information and your marks
and congratulations your done, all you have left to do
is Save it!!
Thank you for taking the time to try this tutorial.
I hope you enjoyed it.
Tuesday, September 30, 2008
~Chocolate Fantasy~
MY_Chocolate_Fantasy.jpg)
~Chocolate Fantasy~
This tutorial was written by me on 9-30-2008.
I used PSP X but any version should work fine.
Any resemblance to another tutorial is
unintentional, and strictly coincidental.
For this tutorial you will need the following:
Chocolate Heaven Scrap Kit by Incognito's Scrapz
This is a pay to use kit which can be purchased HERE
Any tube of choice. I am using the Dazzling artwork of
Mark Yanko which can be purchased HERE
One Mask of choice
And of Course as with any tag to make you need a font.
Once we have all of our supplies we are ready to begin.
1. Open new canvas 600 x 600 transparent.
2. Create new raster layer.
Go to selections, select all.
3. Open one of the Chocolate Heaven Papers, copy, then paste into selection.
4. Create new raster layer. Choose second paper, copy, and paste into selection.
5. Selections, Select none.
6. Now go to layers, load/save mask, load mask from disk.
Depending on the papers and mask you chose you may wish to invert mask data.
7. Go to Layers, Merge, Merge group.
You should have something similar to this by now.
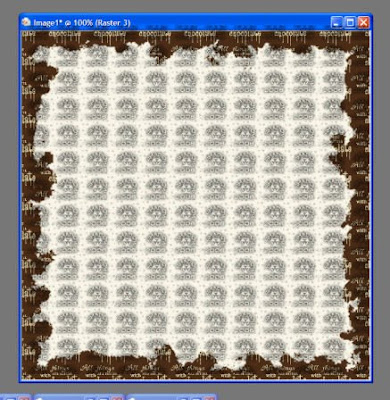
8. Now add a drop shadow to your group layer.
I used H & W 3 blur 8 opacity 80
9. Let's now add our tube as a new layer.
Resize and position as desired.
Add same drop shadow as before.
10. Now it's time to add a few elements.
I chose the Cherry because I wanted to add a more sensuous effect
to what I was working on. You may decide you want a more
romantic approach and use the glitter filled heart. Or something else entirely.
11. Add a ribbon, resize and position as desired.
We should now have something similar to this.
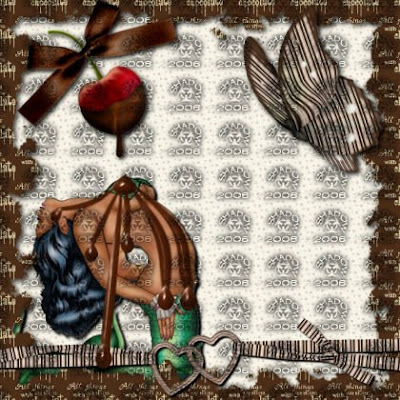
12. If you want an effect of chocolate running over, or smeared over your tube now
is the time to add it. I used a teardrop preset shape, and the warp mesh tool
in order to add chocolate streaks running over my tube.
13. Layers, merge, merge all.
14. Now we need to adjust our resolution to comply with
Most PTU tube TOU's. ( Especially if like me your using something from CILM )
Go to Image Resize Change Resolution to 72 Pixel/Inch
Resize to 70 %
15. Now add Artist information, your marks, and Name.
You're finished!!!!
Subscribe to:
Posts (Atom)
Grab My Blinkie

I CT For


My Fav Places


My Licenses


