E-Mag

Saturday, October 4, 2008
~Spooktacular~
Spooktacular.jpg)
~Spooktacular~
This tutorial was written by me on 10-04-2008.
It is intended for those with a basic knowledge of PSP.
Any resemblance to another tutorial is strictly
coincidental and unintentional. Mine was done using
PSP X but should be able to be completed in any version.
To complete this tutorial you will need the following:
The Spooktacular Scrap kit by Kimmie's Kreations
this is a Pay To Use kit that can be purchased HERE
One mask of choice
At least one tube of choice
I am using the Excellent artwork of Brian Rood
which can be purchased HERE
Now that we have our supplies, we
are ready to begin.
1. Open a new canvas 600 x 600
2. Add new raster layer
3. Go to selections, Select All
4. Open one of the papers from the Spooktaculer kit
Copy and paste into selection.
5. Create new Raster Layer everything should still be selected
6. Open another of the Spooktacular papers that compliments
your first paper as well as your tube. Again Copy and paste into selection
7. Go to selections, Select None
8. Now it's time to ad your mask layer either by going layers
load mask from disk, or if your more comfortable create mask from image.
Either way you will need to fit to canvas, Invert data so that top paper forms a
frame around the bottom paper.
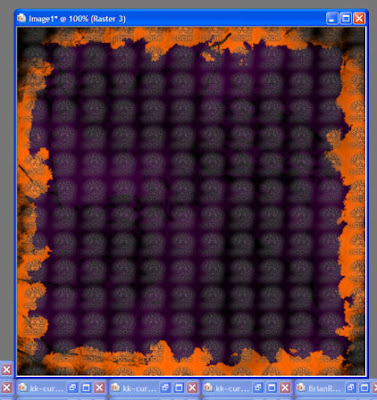
9. Once you have settled on a mask and are happy with the appearance
go to layers, merge, merge group.
You should have something similar to this:
10. It is now time to pick a Spooktacular frame.
Copy and paste as new layer.
11. Using your magic wand click anywhere outside of the frame.
12. Go to selections, invert. Back to selections, modify, contract by 15.
13. Create new raster layer, and move
beneath your frame layer
14. Open a third Spooktacular paper
Again copy and paste into selection
15. Go to selections, Select None
16. Open the tube you have selected to use.
Copy and paste as new layer. Now resize and position beneath frame layer
so it appears like a photograph
17. Add a drop shadow. I used V & H 5 Opacity 100 blur 3 color black
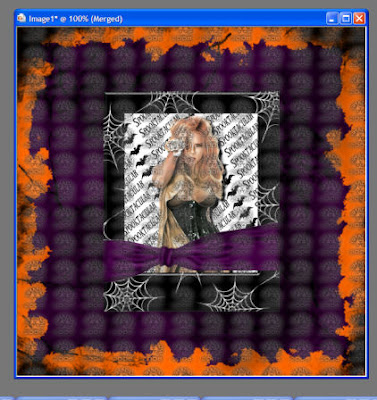
18. Close out your paper and mask layers,
go to layers, merge, merge visible.
You should now have something similar to below
19. This is your jump off point. It's decoration time.
Pick as few or as many elements as you like and decorate your tag.
20. Go to layers, merge, merge all
21. Resize your image by 70%
22. Now pick a Spooktacular Tombstone
resize and position as desired.
23. Add your name to the tombstone
24. Now add artist information and your marks
and congratulations your done, all you have left to do
is Save it!!
Thank you for taking the time to try this tutorial.
I hope you enjoyed it.
It is intended for those with a basic knowledge of PSP.
Any resemblance to another tutorial is strictly
coincidental and unintentional. Mine was done using
PSP X but should be able to be completed in any version.
To complete this tutorial you will need the following:
The Spooktacular Scrap kit by Kimmie's Kreations
this is a Pay To Use kit that can be purchased HERE
One mask of choice
At least one tube of choice
I am using the Excellent artwork of Brian Rood
which can be purchased HERE
Now that we have our supplies, we
are ready to begin.
1. Open a new canvas 600 x 600
2. Add new raster layer
3. Go to selections, Select All
4. Open one of the papers from the Spooktaculer kit
Copy and paste into selection.
5. Create new Raster Layer everything should still be selected
6. Open another of the Spooktacular papers that compliments
your first paper as well as your tube. Again Copy and paste into selection
7. Go to selections, Select None
8. Now it's time to ad your mask layer either by going layers
load mask from disk, or if your more comfortable create mask from image.
Either way you will need to fit to canvas, Invert data so that top paper forms a
frame around the bottom paper.
9. Once you have settled on a mask and are happy with the appearance
go to layers, merge, merge group.
You should have something similar to this:
10. It is now time to pick a Spooktacular frame.
Copy and paste as new layer.
11. Using your magic wand click anywhere outside of the frame.
12. Go to selections, invert. Back to selections, modify, contract by 15.
13. Create new raster layer, and move
beneath your frame layer
14. Open a third Spooktacular paper
Again copy and paste into selection
15. Go to selections, Select None
16. Open the tube you have selected to use.
Copy and paste as new layer. Now resize and position beneath frame layer
so it appears like a photograph
17. Add a drop shadow. I used V & H 5 Opacity 100 blur 3 color black
18. Close out your paper and mask layers,
go to layers, merge, merge visible.
You should now have something similar to below
19. This is your jump off point. It's decoration time.
Pick as few or as many elements as you like and decorate your tag.
20. Go to layers, merge, merge all
21. Resize your image by 70%
22. Now pick a Spooktacular Tombstone
resize and position as desired.
23. Add your name to the tombstone
24. Now add artist information and your marks
and congratulations your done, all you have left to do
is Save it!!
Thank you for taking the time to try this tutorial.
I hope you enjoyed it.
Subscribe to:
Post Comments (Atom)
Grab My Blinkie

I CT For


My Fav Places


My Licenses


0 comments: