Links of Interest
Followers
Blog Archive
Tuesday, September 30, 2008
~Chocolate Fantasy~
MY_Chocolate_Fantasy.jpg)
~Chocolate Fantasy~
This tutorial was written by me on 9-30-2008.
I used PSP X but any version should work fine.
Any resemblance to another tutorial is
unintentional, and strictly coincidental.
For this tutorial you will need the following:
Chocolate Heaven Scrap Kit by Incognito's Scrapz
This is a pay to use kit which can be purchased HERE
Any tube of choice. I am using the Dazzling artwork of
Mark Yanko which can be purchased HERE
One Mask of choice
And of Course as with any tag to make you need a font.
Once we have all of our supplies we are ready to begin.
1. Open new canvas 600 x 600 transparent.
2. Create new raster layer.
Go to selections, select all.
3. Open one of the Chocolate Heaven Papers, copy, then paste into selection.
4. Create new raster layer. Choose second paper, copy, and paste into selection.
5. Selections, Select none.
6. Now go to layers, load/save mask, load mask from disk.
Depending on the papers and mask you chose you may wish to invert mask data.
7. Go to Layers, Merge, Merge group.
You should have something similar to this by now.
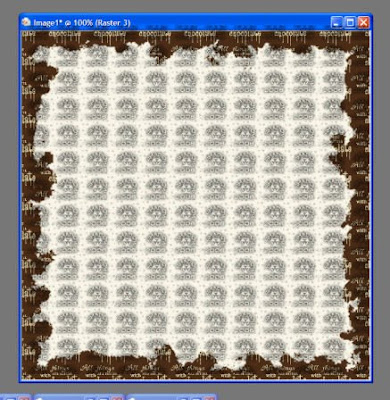
8. Now add a drop shadow to your group layer.
I used H & W 3 blur 8 opacity 80
9. Let's now add our tube as a new layer.
Resize and position as desired.
Add same drop shadow as before.
10. Now it's time to add a few elements.
I chose the Cherry because I wanted to add a more sensuous effect
to what I was working on. You may decide you want a more
romantic approach and use the glitter filled heart. Or something else entirely.
11. Add a ribbon, resize and position as desired.
We should now have something similar to this.
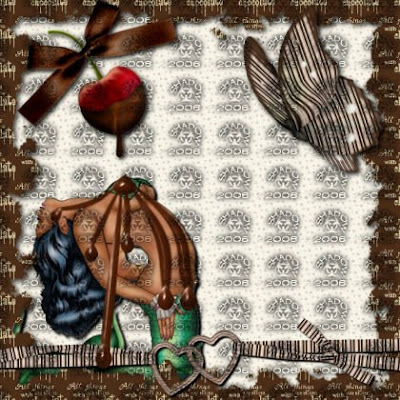
12. If you want an effect of chocolate running over, or smeared over your tube now
is the time to add it. I used a teardrop preset shape, and the warp mesh tool
in order to add chocolate streaks running over my tube.
13. Layers, merge, merge all.
14. Now we need to adjust our resolution to comply with
Most PTU tube TOU's. ( Especially if like me your using something from CILM )
Go to Image Resize Change Resolution to 72 Pixel/Inch
Resize to 70 %
15. Now add Artist information, your marks, and Name.
You're finished!!!!
Thursday, September 25, 2008
~Simple Treat~
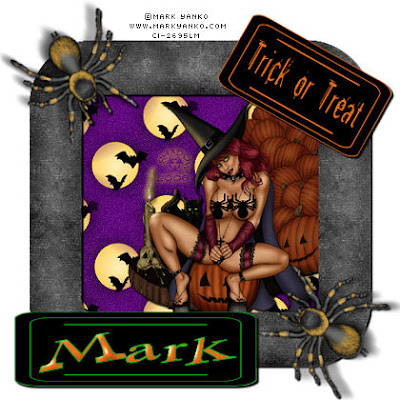MY_Simple_Treat.jpg) ~Simple Treat~
~Simple Treat~This tutorial was written by me on 9-25-2008 using PSP X
intended for those with a basic working knowledge of Paint Shop Pro.
Any resemblance or similarities to other tutorials
are merely coincidental and unintentional.
To complete this tutorial you will need the following:
Monti's Halloween Scrap Kit which is a Free to use kit
that can be found HERE Please be sure to read her TOU's.
One tube of choice. I am using the awesome artwork of
Mark Yanko which you can purchase HERE
Now that we have our supplies we are ready to begin.
1. Open New Canvas 600 x 600 transparent.
2. Create new raters layer. Go to selections, select all.
3. Open one of the Frames provided in the Scrap Kit
I am Using Black Tarantula. Copy and paste into selection.
Selections, select none.
4. Add a drop shadow on your frame layer. I used V 3, H 3, Opacity 100, and blur 3.
5. Using your magic wand tool, tolerance 10, feather 0,
click on the inside of your frame.
6. Go to Selections, modify, expand by 35 this should put your marching
ants about half way into the frame like so.
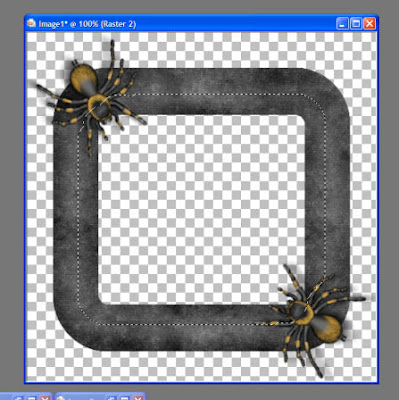
7. Open one of the papers provided, ( I am using the Purple Bats Paper )
Paste as new layer, and move beneath your frame layer.
8. Go to selections, Invert, press delete. Selections, select none
You should now have something that looks similar to this.
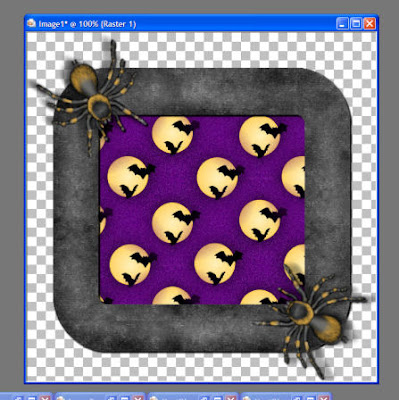
9. Copy and paste your tube as a new layer. Resize and position as desired.
Then move between your paper layer and your frame layer.
Now add a drop shadow to your tube using the same settings as before.
10. Add any decorations or elements that you choose at this time.
11. Layers, Merge, Merge all
11. Resize by 70 %, add your artist information,and your marks.
Add your name and your finished.
Thank you for taking the time to follow
my tutorial. I hope it was easy enough, and you enjoyed it.
Monday, September 22, 2008
~Dayglow Roller~
Dayglow Roller
This tutorial was written by me on 9-21-2008
Any similarities to another tutorial is purely coincidence and unintentional.
Materials needed are:
Dayglow Dayz Scrap Kit by Scraps by Storm
this is a Pay To Use kit which can be purchased HERE
One tube of choice, I'm using the Awesome Artwork of Ted Hammond
which is Pay To Use and can be purchased HERE
Eye Candy 3 Inner Bevel
Once we have selected our tube and prepared
the Sbs_Dayglow Dayz Kit we're ready to begin
1. Open new canvas 600 x 600 transparent
2. Open the sbs_DD square glitter frame of your choice
now copy and paste as new layer
3. Using your magic wand tolerance 10, feather 0, click inside your frame
go to selections, modify, expand by 10
5. Open one of the sbs_DD papers of choice I used Striped Paper1
copy and paste as new layer and move beneath your frame.
Now go to selections, Invert, and hit delete. Select None
6. Back to your Square frame layer using your magic wand same settings as before
once again click inside your frame.
7. Create new raster layer then open one of the sbs_DD Star frames
copy and paste into selection. Selections, select none.
7. Go to effects, Eye Candy 3 Inner bevel
Bevel width 12, Bevel Shape Rounded, Smoothness 9, Shadow depth 10
Brightness 90, Sharpness 40, Direction 134, Inclination 67
By now you should have something that looks like this
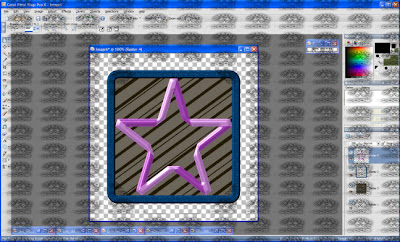
8. Using your magic wand, again same settings as before, click
inside your star frame. Go selections, modify, expand by 10, selections, invert.
9. Open another of the sbs_DD papers and paste as new layer
move the paper beneath your star frame, delete. Selections, select none.
10. Back to your star frame, add a drop shadow as you see fit.
I used V & H 3 Blur 3, and Color Black
11. Now add your tube as new layer, resize and position as desired.
Add drop shadow same settings as used on star frame.
12. Depending on the tube you chose you may want to add a few additional
elements from the Dayglow Dayz kit to compliment this is of course
completely optional. I added a knotted ribbon to mine.
13. Merge all flatten, resize as desired. Add Artist information, watermark and name.
Congratulations you've completed your tag!
Sunday, September 21, 2008
~Harvested Buccaneer~
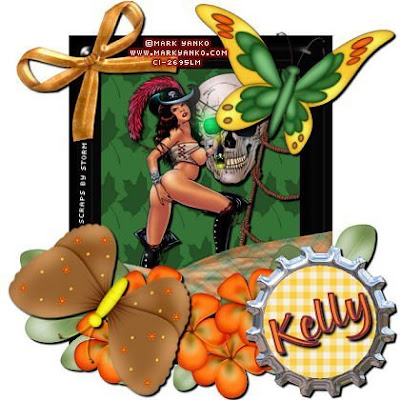MY_Sbs_Harvested_BuccaneerMA20200700-0008.jpg)
~Harvested Buccaneer~
This tutorial was written by me on 09-19-2008
Any similarity to another tutorial
is completely coincidental, and fully unintentional.
This tutorial was written using PSP X, but should be easy to follow
no matter what version you are using.
Materials you will need are as follows:
1 tube of choice
I am using the wonderful work of Mark Yanko
which can be purchased here or direct to his art here
1 font of choice
Autumn Harvest Scrap kit from: Scraps by Storm
this is a PTU Scrap Kit that can be purchased here
Once you have all your materials you will be ready to begin.
1. Open new canvas 600 x 600 fill white
2. Open sbs_autumnharvestwrappedframe of choice
paste as new layer and resize to 130 percent
be sure that all layers is not checked
3. Now let's paste your tube as new layer
move under your frame layer
resize and position as desired add drop shadow.
resize and position as desired add drop shadow.
I used V & H 3 and Blur 3 Opacity 100% color 000000
You should now have something similar to this
You should now have something similar to this
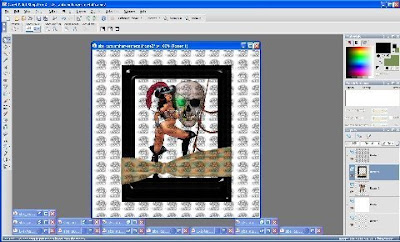
4. Now using your magic wand on the same layer as your frame
click anywhere outside your frame this will place marching ants surrounding your frame.
5. Go to selections and invert selection
6. Selections modify, contract by 5
7. Add new raster layer and move beneath your frame and tube layers
8. Choose one of the sbs_autumnharvest papers and copy
9. With your empty raster layer selected insert into selection
10. Selections, select none
We should now be to a point that we have something that looks like this
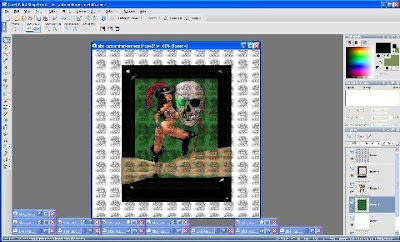
11. Now it's time to decorate! Select the sbs_autumnharvestfloral piece
that best compliments your image as completed to this point
and paste as new layer. Now position across the bottom edge of your frame.
Add the same drop shadow used on your tube layer.
12. Select one of the sbs_autumnharvestbottlecaps paste as new layer
and move to lower right hand corner again add drop shadow as before
13. Select one of the sbs_autumnharvestbutterflies paste as new layer
resize to achieve desired size and place toward top right corner of frame
adding a drop shadow here is completely up to you I used the same as previously used
14. Now we pick one of the sbs_autumnharvestbeadedbutterflies to paste as new layer
15. Go to Image, flip, now resize as desired back to image, rotate, free rotate
I used rotate right, free 30 degrees.
Place the beaded butterfly in the lower left corner over the floral
16. Pick one of the sbs_autumnharvestbows that you feel compliments everything else
and paste as new layer. resize and rotate as desired to place over top left corner of your frame.
17. Go to merge, merge all flatten, and resize all layers.
I use 70% this gives us a finished size of 420 x 420
adjust as you see fit.
18. Now add your artist information, taggers watermark, and name.
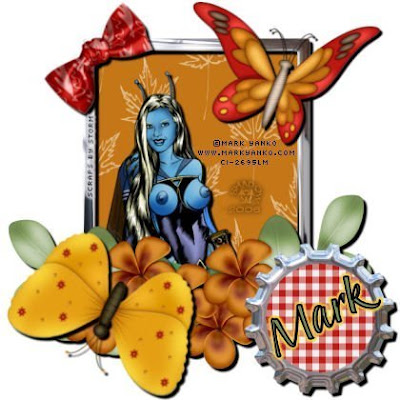
We're done!!!
The one below is a variation done with different elements from Scraps By Storm
and again the Awesome work of Mark Yanko!!
MY_SbS_Autumn_ResistanceMA20200700-0011.jpg)
~Spiral Love~

~Spiral Love~
This tutorial was written by me on 09-17-2008, and any similarities
to others are merely coincidental.
This tutorial was written using Corel PSP X and Jasc Animation Shop 3
To complete this tutorial you will need one tube of choice,
I am using the awesome artwork of Mark Yanko
which you can purchase here Creative Image Licensing and Management ,
or direct to his page here Mark Yanko Images and Tubes ,
one preset shape or tubed accent of choice,
one paper or pattern of choice, one mask of choice,
font of choice, and Mura Meister Copies plug in.
Now that you have chosen your tube or tubes
and preset shapes or accents we are ready to begin.
1. Open new canvas 600 x 600 fill with pattern or paper of choice
2. Create new raster layer and fill with color that compliments tube
3. Add mask layer ( may need to invert mask, once happy with Mask merge group )
4. Add tube of choice and position as desired
(yes this can include moving beneath your mask layer if you left that possibility open by inverting your mask )
By now you should have something that looks like this...
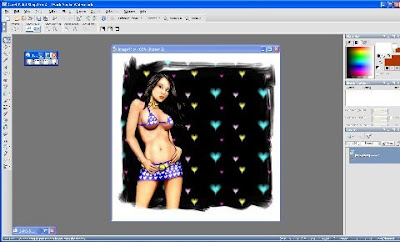
5. Create new raster layer and place preset shape, go to objects, align, center in canvas now
go to layers merge down
( if using an accent instead of a preset shape just paste as new layer )
6. Move your shape or accent layer beneath your tube layer
7. Go to Effects, Plug ins Mura Meister Copies, Spiral
( we will call this layer spiral )
You should now have something that looks like this
go to layers merge down
( if using an accent instead of a preset shape just paste as new layer )
6. Move your shape or accent layer beneath your tube layer
7. Go to Effects, Plug ins Mura Meister Copies, Spiral
( we will call this layer spiral )
You should now have something that looks like this
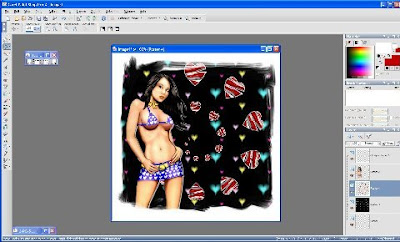
8. Duplicate your Spiral Layer and go to Image Rotate, Free Rotate, Right 15
( be certain that the all layers box is not checked )
( this layer will be Spiral 2 )
9. Duplicate This layer and repeat rotate
( this layer will be Spiral 3 )
10. Resize all layers.. I use 70 % as this will give a finished size of 420 x 420
11. It is now time to add artist © and your license number if using a licensed artist
as well as your watermark if you choose to do so
12. Add new raster layer above all other layers and add name
13. Open Animation Shop
14. Make Spiral 2 and 3 invisible
15. Copy Merged then go over to Animation Shop and paste as new Animation
16. Go back to PSP Close out ( make invisible) Spiral and make visible Spiral 2
17. Again Copy Merged and go back to Animation Shop this time right click on the previous
image and select paste after current frame
18. Back to PSP close out Spiral 2 and make visible Spiral 3
19. Once More Copy merged and back to Animation Shop paste after current frame
20. You may want to play with frame properties to achieve the speed and effect you desire
( I used 15 for this one ) otherwise just save as .gif and you're done!!!
~Tunnel Vision~
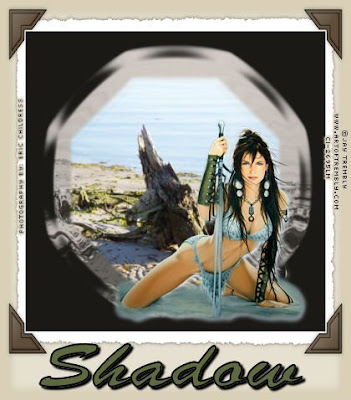
Tunnel Vision
This tutorial was created by Shadow on 03-28-2007. any similarities to other
tutorials are purely accidental.
What you'll need. A background tube such as a misted landscape,
and a second tube of choice. I am using the Artwork of
Jay Trembly which can be purchased HERE
All effects are included with PSP so no need to search for filters or plug-ins,
and of course you need a font of your choice. As the supplies needed are
simple enough I will not be including any with this tutorial.
1. Open both tubes in PSP
2. Create a new image 500 by 500 transparent
3. create new raster layer flood fill this layer with a
dark color from your background tube
4. create new raster layer and flood fill with a lighter color from your
background tube
5. go to layers, new mask layer, from image, select your background tube
the drop down options bar source luminance, make sure that invert
mask data is not checked.
6. effects, distortion effects, ripple with these settings( horizontal 50, vertical 50
amplitude 10, wavelength 40, edge mode color black)
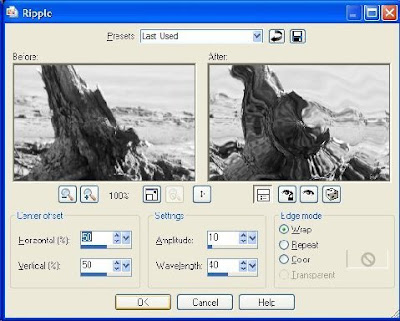 select layers, layer merge, merge group
7. select background tube, copy and then once again select your image paste as
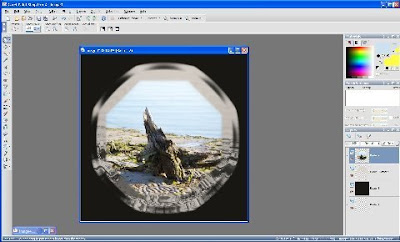
new layer ( you may have to resize your tube layer, I used 80% )
you should have something similar to this
8. now select your second tube/ foreground tube copy and paste as new
layer then position were you feel it looks best
9. effects, 3D effects, drop shadow ( vertical 3, horizontal 3
opacity 50, blur 10, color... find what you think works best )
10. ( this step optional) go to image, picture frame, and select a frame that
works for you
11. Resize as desired add your watermark and text then merge all
flatten, and we're done...
Thank you for attempting this my first ever tutorial I hope you
found this tutorial easy to follow and fun to do
Subscribe to:
Posts (Atom)


