Links of Interest
Followers
Blog Archive
Sunday, September 21, 2008
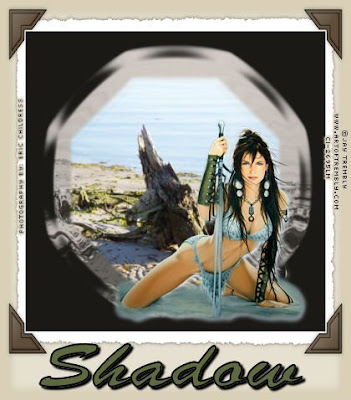
~Tunnel Vision~

Tunnel Vision
This tutorial was created by Shadow on 03-28-2007. any similarities to other
tutorials are purely accidental.
What you'll need. A background tube such as a misted landscape,
and a second tube of choice. I am using the Artwork of
Jay Trembly which can be purchased HERE
All effects are included with PSP so no need to search for filters or plug-ins,
and of course you need a font of your choice. As the supplies needed are
simple enough I will not be including any with this tutorial.
1. Open both tubes in PSP
2. Create a new image 500 by 500 transparent
3. create new raster layer flood fill this layer with a
dark color from your background tube
4. create new raster layer and flood fill with a lighter color from your
background tube
5. go to layers, new mask layer, from image, select your background tube
the drop down options bar source luminance, make sure that invert
mask data is not checked.
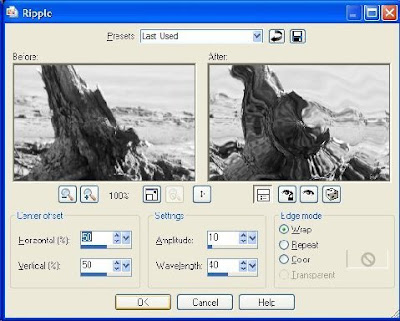
6. effects, distortion effects, ripple with these settings( horizontal 50, vertical 50
amplitude 10, wavelength 40, edge mode color black)
 select layers, layer merge, merge group
7. select background tube, copy and then once again select your image paste as
new layer ( you may have to resize your tube layer, I used 80% )
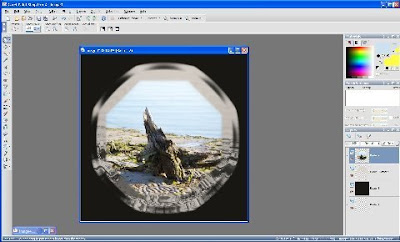
you should have something similar to this

8. now select your second tube/ foreground tube copy and paste as new
layer then position were you feel it looks best
9. effects, 3D effects, drop shadow ( vertical 3, horizontal 3
opacity 50, blur 10, color... find what you think works best )
10. ( this step optional) go to image, picture frame, and select a frame that
works for you
11. Resize as desired add your watermark and text then merge all
flatten, and we're done...
Thank you for attempting this my first ever tutorial I hope you
found this tutorial easy to follow and fun to do
Subscribe to:
Post Comments (Atom)
0 comments: